We had a previous run with this technique/theme in May of 2016. Beau created examples at that time and included the description below as she hosted that group art exchange. You can go to the SEARCH bar on the right side of our home page and type in "Drips & Splatters" to see what participants made.
Since some of us are soon going to be in the rainy/melting season (Bye-Bye Snow!!!), this seemed an appropriate time to have a re-run of the fun!
For those who are "exuberant" with their medium-flinging, may I recommend placing your blank post card stock in an open box to keep from accidentally splatter-painting/inking your surroundings. (Thin rubber gloves might also be useful... And wearing a smock or apron?)
Masking will allow adding details or focus later without spatters/drips on them.
Another idea: Work with a larger piece of cardstock, drip or splatter to your heart's content, cut down into as many postcard-sized pieces as you like, then finish off each one.
Materials may include watercolors, inks, acrylic paints (possibly watered down), food colorings, dyes, etc. Some inks work better on coated paper like photo paper. (Spray inks might work as well...)
You can add details (collage, rubber stamped images, stickers, etc.) to your dried splatter/dripped backgrounds and- Voila!
 |
| by Beau |
 |
| by Beau |
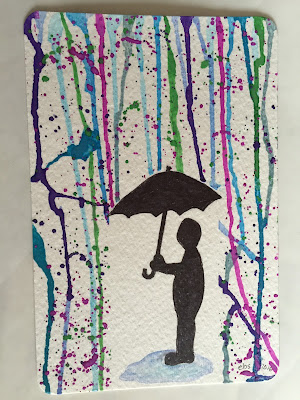
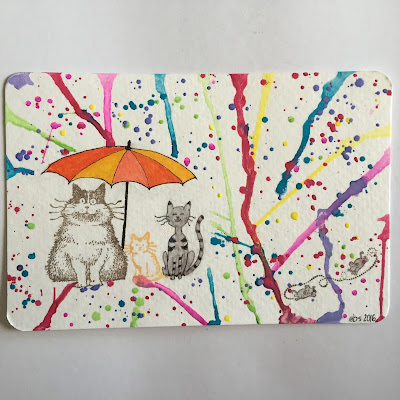
According to Beau: "Here are two examples I made recently, just because I was in the mood to try something new and was inspired by something similar I saw on Pinterest. With an umbrella design in mind, I used masking tape to cover up the shape of the umbrella I planned to draw, and went all the way down to the bottom of the card with the tape, so it would be white and have no drips in that area. I used cheap plastic palette cake watercolors, got them really wet and then scraped the different colors along the edge of the postcards so the drops of colors would drip down the card. I sometimes turned the cards in mid-drip so they'd branch off in different directions. When the colors were dry, I then wet my paintbrushes again with the watercolors, then held the brush horizontally above the postcard and then gently tapped the handle of the brush so that a few small drops splattered on the card. You could also wet an old toothbrush with color and run your finger over it to spray a fine mist of color. You could also use a spritzer to achieve a fine spray of color, too.
When the drips and splatters were dry, I peeled off the masking tape and then drew my umbrella and the figure of the boy in the white area. On the one with the cats, I rubber stamped two and hand-drew the other and colored them in with colored pencils."
PARTICIPANTS: Make 1 - 4 post cards to be exchanged with your swap partners. Honi is hosting this exchange.


